Sabtu, 02 Mei 2015

2008-2009 FORD FOCUS ELECTRONIC CRUISE KIT 250-1840

http://carmarzus.blogspot.com/
2008-2009 FORD FOCUS ELECTRONIC CRUISE KIT 250-1840 - A. Pre-Installation Suggestions 1. It is advisable to disconnect the negative battery cable for 3 minutes before beginning installation, to avoid unintended air bag deployment. Note and record any anti-theft radio codes prior to disconnecting. Figure 1 2. Remove the driver side lower dash and kick panels. Remove the steering wheel shroud. Figure 2 B. Install Electronic Module 1. Apply the large supplied piece of double- sided adhesive tape to the Cruise Control Module. 2. Plug in the Main Wiring Harness, Switch Harness, and Pedal Interface Harness onto mating connectors of the Cruise Control Module.

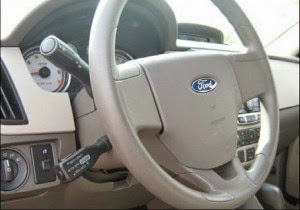
Figure 3 3. Place the Cruise Control Module in the secure location behind the driver side dash area as shown in Figure 4 . 4. Route the Pedal Interface Harness through steering column and down to the accelerator. 5. Locate the 6 pin plug and mate connectors on the Pedal Interface Harness. Remove the accelerator 6-pin connector and apply to mating connector of Pedal Interface Harness. Apply the other connector to the accelerator. Figure 4 C. Wiring Connections 1. Locate the following wires to connect to the main harness from the control module: 2. Use the supplied self stripping connectors or T-tap to connect from the Main Harness to vehicle wire: 3. Apply the Black Ground Wire from the Main Harness to the Vehicle Ground Point at the kick panel. Figure 7 4. VSS : For reference, find the medal bracket in front of the gray and blue connectors at the center of the engine compartment.

Figure 8 . Locate the gray 2-pin or (3-pin manual transmission) connector on the transmission below the bracket. Figure 9. Note: The 3-pin connector will be covered with foil tape . Connect the Violet Wire from the Main Wiring Harness to the Blue extension wire using the male spade terminal (both supplied in hardware kit). Connect extension harness to Brown/Green Wire (VSS) of the connector. Apply the supplied weather sealant to the connection in the engine compartment. Be sure all of connection is sealed properly. Figure 10 5. Clutch Switch for Manual Transmissions : Locate the black 2-pin connector on the clutch switch. Connect the White Wire from the Main Wiring harness to the Green /Violet Wire of the clutch switch. Secure Cruise Control and Switch Interface Module harnesses with zip ties away from moving parts. Figure 11

Download : 2008-2009 FORD FOCUS ELECTRONIC CRUISE KIT 250-1840

1990-1993 Acura Integra Radio Replacement

http://carmarzus.blogspot.com/
1990-1993 Acura Integra Radio Replacement - Remove Factory Radio NOTE : To remove the Honda factory radio, (2) two screws at the rear of the radio must be removed from underneath the radio which can be accessed from behind the radio. The Honda radio is secured to the pocket below the radio and will pull out of the dash connected together as one unit. STEP 1 : Move to the passenger side of the vehicle. The screws that secure the radio/pocket assembly to the dash are at the rear of the radio.

The only way to access these screws is to look up at the rear of the radio from the passenger side of the vehicle. With an 8mm socket or phillips screw, locate and remove the screws as can be seen in the photos shown in the NOTE to the left. STEP 2 : Once the screws at the rear of the radio/ pocket assembly have been removed, the radio can be pulled forward out of the dash. Remove Factory Radio STEP 3 : Pull the radio out of the dash. Unplug the black cable plugged into the rear of the radio. Unplug the white plastic wire harness connector plugged into the rear of the radio. Completing The Radio Installation Move to: Wire New Radio Section Wiring The New Radio STEP 1 : Insert the radio installation kit into the dash until it snaps and secures to the dash. TIP: mount the kit to the opening in the dash BEFORE mounting the radio to the kit.

Mounting the radio to the kit before snapping the kit into the dash may prevent the kit from properly snapping into the dash. This step is shown in more detail in the “Mount New Radio” section. STEP 2 : Insert the new radio into the dash. Plug the black antenna cable into the rear of the new radio. Make sure all wire connections for the new radio have been completed and plug in any connectors for the new radio now. Slide the new radio into the radios mounting “cage” or mounting “sleeve”. The Installation Is Now Complete.
Download : 1990-1993 Acura Integra Radio Replacement

Popular Posts

Twitter Facebook More

 
Design by Free WordPress Themes | Bloggerized by Lasantha - Premium Blogger Themes | Affiliate Network Reviews