Tampilkan postingan dengan label Audi. Tampilkan semua postingan

Selasa, 12 Mei 2015

AUDI NEW BEETLE ECU INSTALLATION

AUDI NEW BEETLE ECU INSTALLATION - 1 Remove the Dash Panel. Place both hands on either side of the center dash panel, firmly grip and slide forward, then lift. Step 2 Remove Upper Dash Panel Screws. Remove the four T-20 torx screws securing the upper dash panel. Step 2 Remove the Upper Dash Panel. To remove the upper dash panel, firmly pull the panel upwards being careful not to damage it. Step 3 Remove Lower Dash Panel.

Underneath you will find the ecu housing cover. Remove the torx T-20 screws that secure the cover. Pull the ECU housing cover upward to expose the ECU. Step 4 Remove the ECU. To remove the ECU wiring harness, pull the tabs on harness away from the ECU. As this is done, the harness connector will pull away from the ECU. The reinstallation of the ECU is the reverse of the removal. Step 5 Installing the Fuel Pressure Regulator. Depending on the ECU version of your Beetle, an upgraded FPR may be required. The following steps will illustrate the process. Begin by remove the engine cover, then expose the engine cover screws by removing the dust caps. Remove the bolts securing the engine cover with the 10mm socket. Step 6 Remove Vacuum Line. Remove the hose clamp to the fuel pressure regulator vacuum using a pair of wire cutters. Step 7 Replace the Fuel Pressure Regulator.

CAUTION.. Remove the fuel filler CAP prior to this step to help alleviate residual fuel pres- sure. Remove the stock FPR by releasing the C-clip with a flat head screwdriver. As you remove the FPR from the fuel rail, COVER the FPR with a RAG. The fuel may still be under pressure, and cause it to spray. Always WEAR SAFETY GLASSES when working near fuel systems. Installing the new FPR using the original C-clip.

Download : AUDI NEW BEETLE ECU INSTALLATION

Senin, 11 Mei 2015

Audi A4 Quattro Suspension Kit Installation Instructions

 Audi A4 Quattro Suspension Kit Installation Instructions - Remove Wheels • Remove nut (1) and bolt (2). (According to manufacturer, “Audi”, bolt and nut must be replaced) • move the two upper balljoints (3 and 4) upwards. • remove nut (5) and bolt (6). • remove caps and take off nuts (7 and 8). • remove complete shock spring assembly. • Dismantel using spring compressor • while dismantling the shock spring assembly – review the parts list. • Note: When removing the spring shock – unit consider the position of the pivot bearing (Figure 2). • Adjust lower spring seat height (see parts list, upper edge spring plate to center attachment bolt) • Installation is the reverse or removal. Note torque specs of following page. Kit instructions for threaded Suspension Kit Audi A4 Quattro • Remove Wheels • Remove nut (1) and lower damper attachment bolt (2) • Remove nut (3) and bolt (4). • Remove four bolts (Noted as 5) and remove the complete suspension assembly. • Remove bolt from top of shock. • During assembly of the unit, position the top fixing eye correctly relative to the lower eye. • Adjust spring seat height (figure 4, upper edge spring seat to center of mounting bolt) · • Installation is the reverse of removal. • Torque to spec. 1. Upper mounting nut M12 x 1.25 2. Upper spring seat. 3. Bump Rubber and dust shield. 4. Spacer. 5. Plastic Washer. 6. Front Damper with Threaded sleeve. 7. Front coil spring. 8. Upper mounting bolt and nut. 9. Threaded body shock. 10. Upper mounting assembly. 11. Rear coil spring. Items 2, 3, 4, 8 and 10 are OriginalAudi – Parts!
Download :  Audi A4 Quattro Suspension Kit Installation Instructions

Senin, 04 Mei 2015

Audi A4 Quattro Suspension Kit Installation Instructions

Audi A4 Quattro Suspension Kit Installation Instructions - • Remove Wheels • Remove nut (1) and bolt (2). (According to manufacturer, “Audi”, bolt and nut must be replaced) • move the two upper balljoints (3 and 4) upwards. • remove nut (5) and bolt (6). • remove caps and take off nuts (7 and 8). • remove complete shock spring assembly. • Dismantel using spring compressor • while dismantling the shock spring assembly – review the parts list. • Note: When removing the spring shock – unit consider the position of the pivot bearing (Figure 2). • Adjust lower spring seat height (see parts list, upper edge spring plate to center attachment bolt) • Installation is the reverse or removal. Note torque specs of following page. Kit instructions for threaded Suspension Kit Audi A4 Quattro • Remove Wheels • Remove nut (1) and lower damper attachment bolt (2) • Remove nut (3) and bolt (4). • Remove four bolts (Noted as 5) and remove the complete suspension assembly. • Remove bolt from top of shock. • During assembly of the unit, position the top fixing eye correctly relative to the lower eye. • Adjust spring seat height (figure 4, upper edge spring seat to center of mounting bolt) · • Installation is the reverse of removal. • Torque to spec. 1. Upper mounting nut M12 x 1.25 2. Upper spring seat. 3. Bump Rubber and dust shield. 4. Spacer. 5. Plastic Washer. 6. Front Damper with Threaded sleeve. 7. Front coil spring. 8. Upper mounting bolt and nut. 9. Threaded body shock. 10. Upper mounting assembly. 11. Rear coil spring. Items 2, 3, 4, 8 and 10 are Original – Audi – Parts!

Download : Audi A4 Quattro Suspension Kit Installation Instructions

Rabu, 29 April 2015

AUDI TT Sport Sway Bar Kit 22806

http://carmarzus.blogspot.com
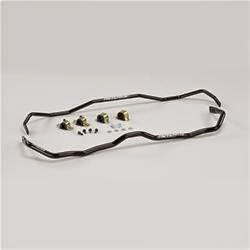
AUDI TT Sport Sway Bar Kit 22806 - Installation of Hotchkis Front Sway Bar 1F Raising Vehicle Raise front of the vehicle by using a 4 post lift or drive-on ramps. Securely block the rear wheels of the vehicle. Do not remove the front wheels during installation for safety. 2F Observe Orientation Of the Bar Remove the lower splash shield, and observe the location and orientation of the front swaybar. 3F Remove End Links Locate and remove the lower end link nuts from both sides, and push links aside. 4F Remove Engine Mount Locate and remove lower engine mount that attaches to subframe.

The engine may want to shift forward which is ok. 5F Remove Exhaust Hanger Use a pry bar to remove the exhaust hanger located behind subframe. 6F Ride Height Sensor Locate the ride height sensor located on the drivers side lower control arm, and remove the nut from the stud that attaches the sensor to the arm. (Be careful, this part can break easily). 7F Sub Frame Support the sub frame with a jack, and locate and remove the 4 sub frame bolts that attach it to the chassis. Lower the jack until the sub frame is at full droop, and slightly pry down until you can access the sway bar bolts. (Don’t worry, it will not fall being that it is still attached to the struts.) 8F Remove the Sway Bar Now remove the sway bar brackets that attach it to the sub frame.

The drivers side bracket has a clamp for the power steering lines that must be removed in order to completely remove the bracket. (It does not need to be re-installed.) Now you can remove the sway bar. 9F Installation Place the new swaybar next to the factory bar so that you will be familier with the oriention that the bar is installed. Apply a good amount of the silicon grease that is supplied with the bushings, and install the bushings on the bar. After the swaybar is mounted the subframe, there is a line clamp bolted to the front of the rack & pinion on the passenger side that needs to be rotated 180 degrees in order to allow free articulation of the sway bar. Now the rest of the installation can be done in reverse order as the removal. You may need a jack to help place the subframe in the proper location.

Download : AUDI TT Sport Sway Bar Kit 22806

Rabu, 22 April 2015

2002-2006 AUDI A4 IN DASH INSTALLATION KIT

2002-2006 AUDI A4 IN DASH INSTALLATION KIT - 2002-06 Audi A4 vehicles. Included are all the parts you need to mount your car stereo/cassette or CD player into your vehicle’s dash. Refer to the individual instruction in this manual to remove your vehicle’s factory radio and assemble the kit.

CAUTION: Disconnect your vehicle’s negative battery terminal before the installation to help prevent electrical damage. We recommend the use of a volt/ohm meter over a test light to check wiring. A test light or grounded wire probe can cause damage to the vehicle’s computer and/ or diagnostic systems. Avoid all factory air bag wiring – air bags can accidentally deploy causing serious injury or death. NOTES: •See your vehicle’s instructions for any special tools your installation might require.

Read all instructions accompanying your car stereo/cassette player for proper wiring and mounting instructions. CAR STEREO CONNECTORS PROVIDE EASY CONNECTION OF YOUR CAR STEREO TO FACTORY WIRING HARNESS. VW03B 2002-UP Volkswagen and BMW CAUTION: REAR SUPPORT AVAILABLE SEPARATELY. REAR SUPPORTING THE RADIO ADDS TO THE INSTALLATIONS RADIO REMOVAL: 1. Using two (2) sets of DT-2 radio removal tools, push into all four (4) slots until secure. 2. Pull out radio, unplug and remove. IN DASH DIN PULLOUT, DETACHABLE FACEPLATE, (DIN-E) RADIOS The kit panel comes DIN ready, Follow the instructions supplied with the radio, secure the mounting kit.

Install the assembly in the dash and use the rear support strap supplied with the radio to support the rear of the radio. 2 5716R BRACKET. ATTACHING MOUNTING BRACKETS (FRONT): Align the (2) 5716L and 5716R brackets with location openings on the kit panel. Pressure fit, push into locations until in place.

Download : 2002-2006 AUDI A4 IN DASH INSTALLATION KIT

Popular Posts

Twitter Facebook More

 
Design by Free WordPress Themes | Bloggerized by Lasantha - Premium Blogger Themes | Affiliate Network Reviews