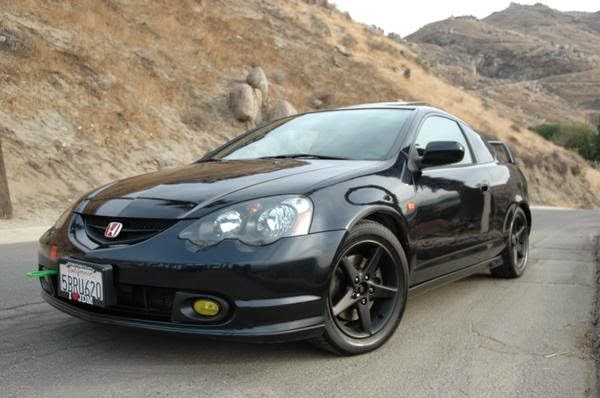
2003 HONDA ACURA RSX FOG LIGHTS INSTALLATION INSTRUCTIONS - PARTS LIST Right fog light Left fog light trim Right fog light trim Left bracket Right bracket Switch harness Fog light harness Switch Templates 4 Step screws 2 Washer-screws 4 Spring nuts Relay Washer-bolt Cushion tape 21 Wire ties. Wire tie with clip 2 Washers Left sub-bracket Right sub-bracket Fuse label TOOLS AND SUPPLIES REQUIRED Phillips screwdriver 10 mm Combination wrench Ratchet 10 mm Socket Diagonal cutters Drill 3 mm, 5 mm, and 10 mm Drill bits Hacksaw blade Utility knife Scissors Pushpin Masking tape Felt-tip pen.
INSTALLATION 1. Make sure you have the anti-theft code for the radio, then write down the frequencies for the preset buttons. 2. Disconnect the negative cable from the battery. Cutting the Front Bumper 3. Using scissors, cut out the templates. Fold both small templates as shown. 4. Position the large left template on the left bumper grille, and tape it in position using masking tape. 5. Using a pushpin, make a hole through each of the three marks indicated on the template. 6. Using a utility knife, score the bumper along the heavy line in the area shown. Remove the large template from the bumper. 7. Insert the two tabs of the small left template into the slits in the front bumper.
Using a pushpin, make a hole through each of the two marks indicated on the template. 8. Remove the small template from the bumper. Using a 3 mm, 5 mm, and a 10 mm drill bit, drill a hole through each of the five marks. 9. Using a felt-tip pen, draw two straight lines across the two upper adjacent 10 mm holes you just made. Repeat on the lower pair of 10 mm holes. 10. Using a hacksaw or a utility knife, cut out the shaded areas for the fog light opening. 11. Position the right template on the right bumper grille, and repeat steps 5 through 10 to cut out the right fog light opening. 12. Disconnect the negative (-) and positive (+) cables from the battery, and release the clip from the holder bolt. Disconnect the negative (-) cable first.
Download : 2003 HONDA ACURA RSX FOG LIGHTS INSTALLATION INSTRUCTIONS
INSTALLATION 1. Make sure you have the anti-theft code for the radio, then write down the frequencies for the preset buttons. 2. Disconnect the negative cable from the battery. Cutting the Front Bumper 3. Using scissors, cut out the templates. Fold both small templates as shown. 4. Position the large left template on the left bumper grille, and tape it in position using masking tape. 5. Using a pushpin, make a hole through each of the three marks indicated on the template. 6. Using a utility knife, score the bumper along the heavy line in the area shown. Remove the large template from the bumper. 7. Insert the two tabs of the small left template into the slits in the front bumper.
 |
| 2003 HONDA ACURA RSX FOG LIGHTS |
Using a pushpin, make a hole through each of the two marks indicated on the template. 8. Remove the small template from the bumper. Using a 3 mm, 5 mm, and a 10 mm drill bit, drill a hole through each of the five marks. 9. Using a felt-tip pen, draw two straight lines across the two upper adjacent 10 mm holes you just made. Repeat on the lower pair of 10 mm holes. 10. Using a hacksaw or a utility knife, cut out the shaded areas for the fog light opening. 11. Position the right template on the right bumper grille, and repeat steps 5 through 10 to cut out the right fog light opening. 12. Disconnect the negative (-) and positive (+) cables from the battery, and release the clip from the holder bolt. Disconnect the negative (-) cable first.
Download : 2003 HONDA ACURA RSX FOG LIGHTS INSTALLATION INSTRUCTIONS


 13.57
13.57
 Unknown


